MovableTypeでAMP対応のページを書き出せるようにAMP用の記事テンプレートを作ってみたのでメモ。
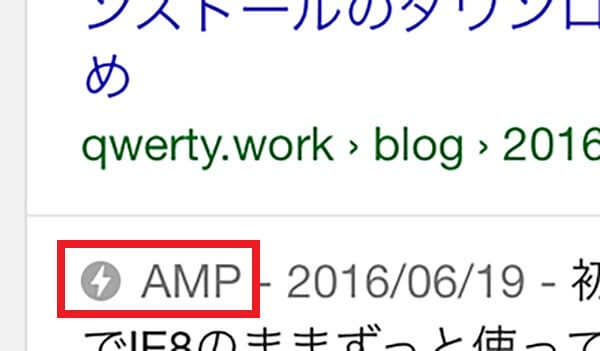
スマホでグーグル検索したときの検索結果の**⚡マークが付いているリンクを開くとページが高速で表示されるというAMP**(アンプ)。

AMP用の記事テンプレートを作成
AMPページでは
- がいる
- をまたはにする
- imgタグをamp-imgにするなどamp-***しないといけないタグがある
- CSSは内部に書かないといけない
- AMP対応のJavaScriptしか使えない
- AdSenseとAnalyticsもAMP対応のコード書き換えないといけない
- etc…
と、いろいろ制約があるので、既存の記事テンプレートをいじるのではなく、AMP専用の記事テンプレートを作成することにしました。テンプレートを登録。
テンプレートのソース
<!DOCTYPE html><br><html amp lang="<$mt:BlogLanguage$>"><br><head><br><meta http-equiv="content-type" content="text/html; charset=UTF-8"><br><meta charset="<$mt:PublishCharset$>"><br><title><$mt:EntryTitle encode_html="1"$>-<$mt:BlogName encode_html="1"$></title><br><$mt:CanonicalLink regex_replace="//amp/","" $><br><meta name="viewport" content="width=device-width,minimum-scale=1,initial-scale=1"><br><script type="application/ld+json"><br> {<br> "@context": "http://schema.org",<br> "@type": "Blog",<br> "headline": "<$mt:EntryTitle encode_json='1'$>",<br> "datePublished": "<$mt:EntryDate format_name='iso8601'$>",<br> "dateModified": "<$MTDate format_name='iso8601'$>",<br> "author": "<$mt:EntryAuthorLink show_hcard="1"$>",<br> "publisher": "Qwerty.Work",<br> "mainEntityOfPage": "<$mt:CanonicalURL with_index="1"$>",<br> "image": ""<br> }<br> </script><br><style amp-boilerplate>body{-webkit-animation:-amp-start 8s steps(1,end) 0s 1 normal both;-moz-animation:-amp-start 8s steps(1,end) 0s 1 normal both;-ms-animation:-amp-start 8s steps(1,end) 0s 1 normal both;animation:-amp-start 8s steps(1,end) 0s 1 normal both}@-webkit-keyframes -amp-start{from{visibility:hidden}to{visibility:visible}}@-moz-keyframes -amp-start{from{visibility:hidden}to{visibility:visible}}@-ms-keyframes -amp-start{from{visibility:hidden}to{visibility:visible}}@-o-keyframes -amp-start{from{visibility:hidden}to{visibility:visible}}@keyframes -amp-start{from{visibility:hidden}to{visibility:visible}}</style><br><noscript><style amp-boilerplate>body{-webkit-animation:none;-moz-animation:none;-ms-animation:none;animation:none}</style></noscript><br><script custom-element="amp-iframe" async src="https://cdn.ampproject.org/v0/amp-iframe-0.1.js"></script><br><script async custom-element="amp-ad" src="https://cdn.ampproject.org/v0/amp-ad-0.1.js"></script><br><script async custom-element="amp-youtube" src="https://cdn.ampproject.org/v0/amp-youtube-0.1.js"></script><br><script async custom-element="amp-analytics" src="https://cdn.ampproject.org/v0/amp-analytics-0.1.js"></script><br><script async src="https://cdn.ampproject.org/v0.js"></script><br><style amp-custom><br> body { margin:0; padding:10px; font-family:sans-serif; }<br> amp-img { background-color: gray; border: 1px solid black; }<br></style><br></head><br><body><br><amp-analytics type="googleanalytics" id="analytics1"> <br> <script type="application/json"><br> {<br> "vars": {<br> "account": "UA-12345678-1"<br> },<br> "triggers": {<br> "trackPageview": {<br> "on": "visible",<br> "request": "pageview"<br> }<br> }<br> }<br> </script> <br></amp-analytics><br><header><br> <h1><mt:EntryTitle></h1><br> <time><mt:EntryDate></time><br></header><br><amp-ad <br> layout="responsive" <br> width=300 <br> height=250 <br> type="adsense" <br> data-ad-client="ca-pub-1234567891234567" <br> data-ad-slot="1234567890"><br></amp-ad><br><article><br> <mt:AmpConvert fix_img_size="1" base_url="https://qwerty.work"><br> <mt:EntryBody><br> <mt:EntryMore><br> </mt:AmpConvert><br></article><br><aside> </aside><br><footer><hr><a href="<mt:BlogURL"><mt:BlogName></a></footer><br></body><br></html><br>
参考ページ


アーカイブマッピングを設定する
AMP用のページはブログルートフォルダの/ampという階層に書き出すことにしたので、
amp/%y%/m%-f
としました。ファイル名.amp.htmlと書き出す手段もあったのですが、/ampに書き出すことにしました。
記事の横のチェックボックスにはチェックを入れないこと。このチェックボックスはデフォルトのアーカイブマッピングを指定するものなので、ここにチェックを入れると、PC用のページのリンクが全部/ampにあるページのURLになってしまいます。
プラグイン「AmpConvert」 を入れる
このプラグインを入れるとimgやYouToube用のiflameタグをAMP用のタグに変換してくれます。以下からプラグインをダウンロードしてMTのpluginフォルダにAmpConvertフォルダを丸ごと置いてアップロードします。

- https://www.ark-web.jp/blog/archives/2016/11/ampampconvert.html
- https://plugins.movabletype.jp/author29eb2/ampconvert.html
使い方
AMP用のコードに変換したいコードを**~**で囲みます。
<mt:AmpConvert>
	<mt:EntryBody>
	<mt:EntryMore>
</mt:AmpConvert>
これだけでimgをamp-imgに、YouTubeのiflameをamp-youtubeに変換してくれます。
AdSenseのコード
~に以下を追加
<script async custom-element="amp-ad" src="https://cdn.ampproject.org/v0/amp-ad-0.1.js"></script>
AMP用のAdSenseコード
サイト運営者 ID(data-ad-client)と広告ユニット ID(data-ad-slot)を自分の広告のコードに書き換えます。
<amp-ad
	width=300 <br>	height=250 <br>	type="adsense" <br>	data-ad-client="ca-pub-1234567891234567" <br>	data-ad-slot="1234567890"
</amp-ad>
詳しくは以下のAdSenseヘルプのページを参照してください。

Analyticsのコード
~に以下を追加
<script async custom-element="amp-analytics" src="https://cdn.ampproject.org/v0/amp-analytics-0.1.js"></script>
AMP用のAnalyticsコード
UA-XXXXX-Yの部分を自分のAnalyticsのコードに書き換えます。
<amp-analytics type="googleanalytics" id="analytics1"><br><script type="application/json"><br>{<br> "vars": {<br> "account": "UA-XXXXX-Y"<br> },<br> "triggers": {<br> "trackPageview": {<br> "on": "visible",<br> "request": "pageview"<br> }<br> }<br>}<br></script><br></amp-analytics>
詳しくは以下のページを参照してください。

AMPページと通常ページの"canonical"
AMPページには通常ページのリンクを記載し、通常ページにはAMPページのリンクを記載します。通常のページは**/blogの階層で、AMPページは/blog/ampの階層**だった場合、以下のようになります。
AMPページ
<link rel="canonical" href="https://www.example.com/blog/document.html">
通常ページ(Non AMPページ)
<link rel="amphtml" href="https://www.example.com/blog/amp/document.html">
構造化データについて
うまく説明できませんが、JSON-LDとかいう構造化データというのがあったほうがいいようです。ブログ用のJSON-LDのサンプルは以下を参考にしてみてください。

ここでAMPページの構造化データのテストができます。

AMP用ページのテスト
出来上がったAMP用のページがちゃんとできているか以下のAMPテストサイトで確認ができます。
Googleの検証サイト

AMP用ページのURLを入れて[テストを実行]をボタンを押します。
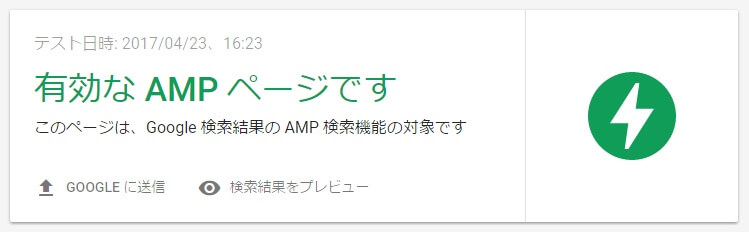
ダメな場合はダメな箇所を教えてくれます。
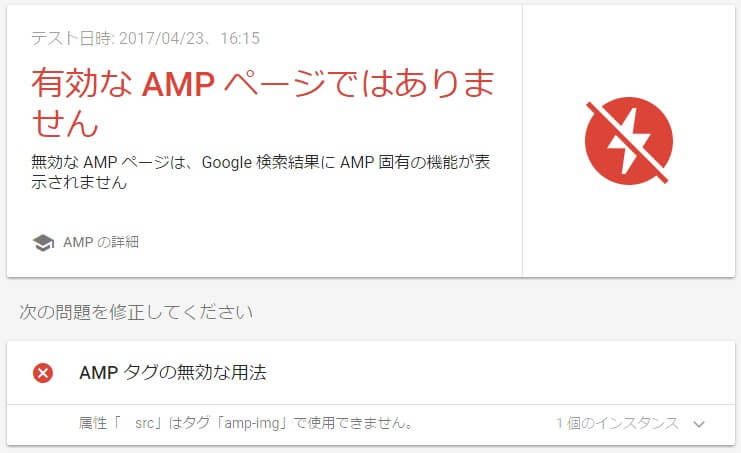
AMP Projectの検証ツール
以下のURLで検証結果を表示できます。
https://validator.ampproject.org/#url=AMPページのurl
Search ConsoleのAMPレポートでエラーチェック
Accelerated Mobile Pages(AMP)レポートAMPページのインデックス状況やエラーや問題を確認できます。

やることはもっとありますが、とりあえず以上でAMPページは導入できたので今回はこのくらいにしておきます。